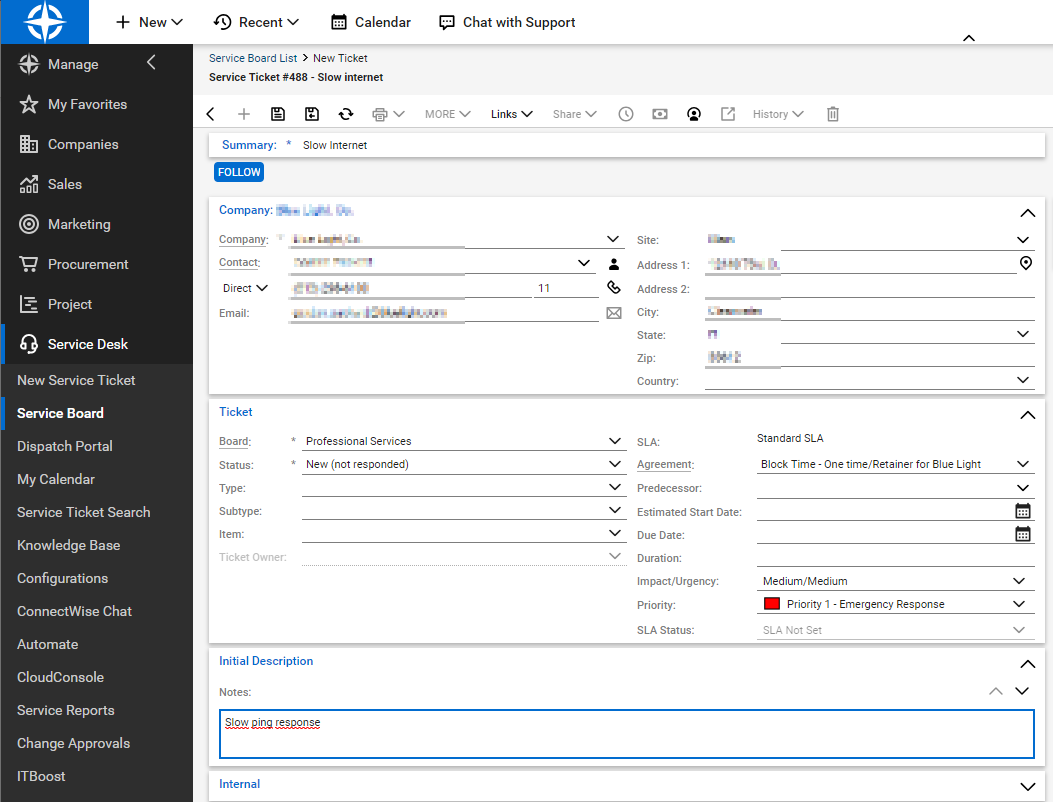
SIGNL4 now includes a new app for connecting to ConnectWise Manage (“Manage”). This makes 2-way integration with Manage a breeze, and responding to service desk tickets can now be done conveniently via mobile app in SIGNL4. This blog article has all the important details.
What features does the integration offer?
The integration offers the following features:
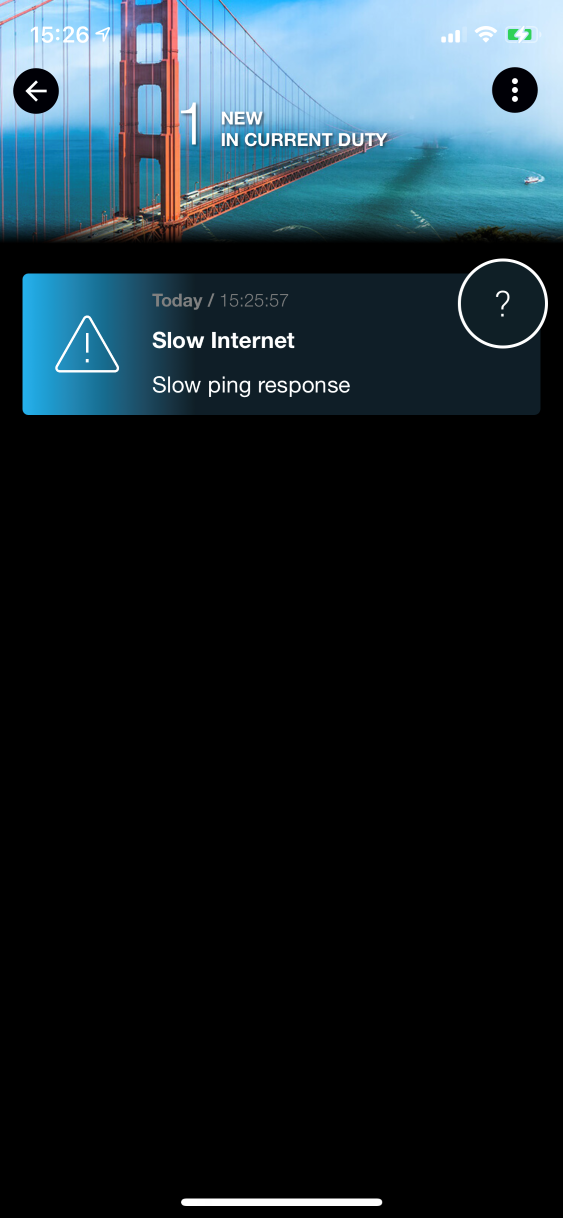
- New Signls, i.e. notifications via push, SMS or call for new service desk tickets
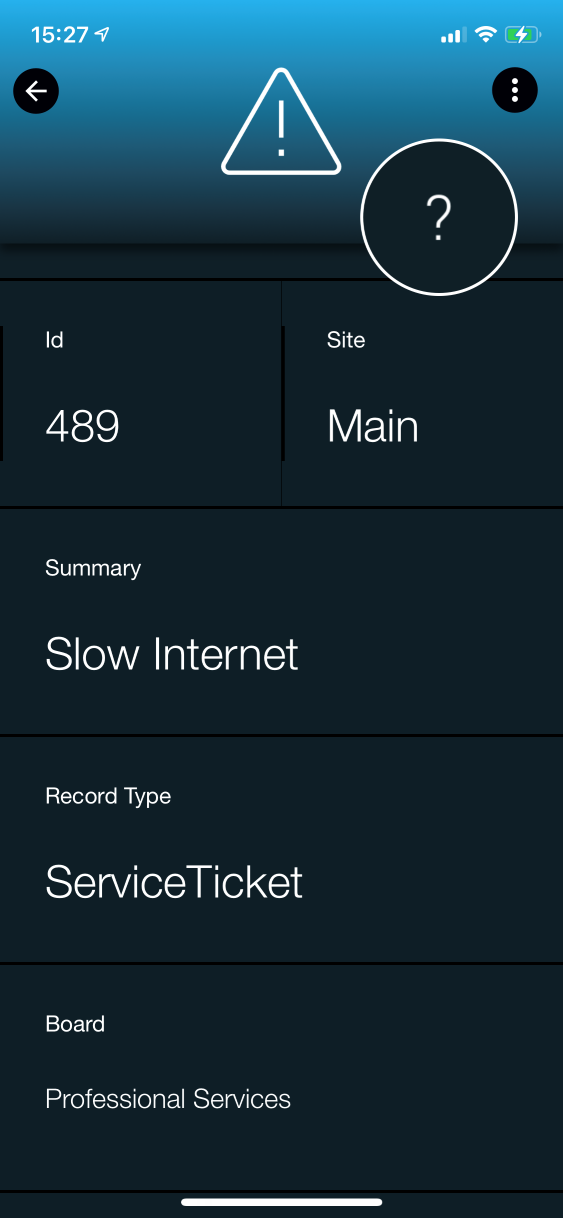
- Display of all desired ticket details, such as notes or tasks
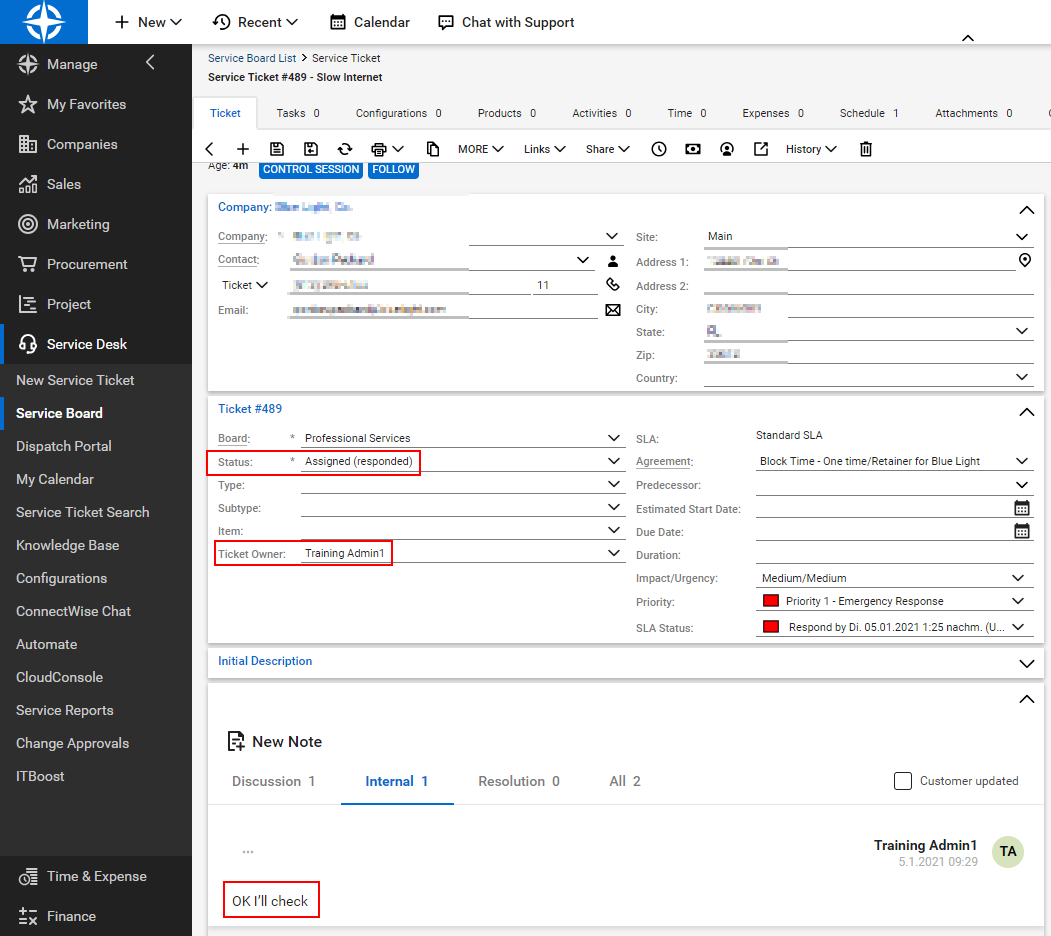
- Status updates of service desk tickets via the mobile app
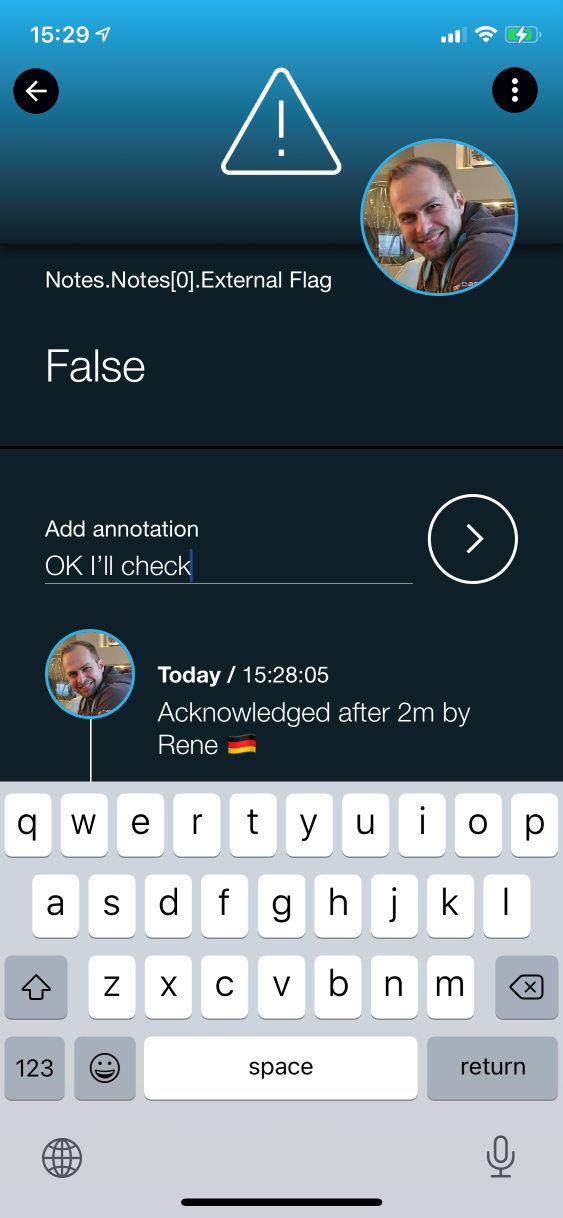
- Setting a ticket owner when acknowledged in SIGNL4
- Adding notes to tickets via the mobile app
- Synchronization of status changes in ConnectWise to SIGNL4.
- Ability to set which tickets should be transferred to SIGNL4 (e.g. only certain priority, etc.)
How does the integration work?
The integration is based on the ConnectWise Manage REST API. SIGNL4 is a client application for this API and retrieves service tickets from it.
API access uses credentials of an API member, which must first be created in Manage (see below). The member, its location, business unit/department, and default board define which service tickets can be seen/retrieved by SIGNL4.
Generally, ConnectWise Manage on-premises or a cloud instance is supported. The Manage API version should be “2019.1” or newer.
What components are needed in Manage?
The connector app in SIGNL4 requires several items in Manage. All except the API member are automatically created by the connector app when it is first started in SIGNL4. The following table gives an exact overview and explains further details about required prerequisites in Manage:
| Type | Sample ID | Created by | Description |
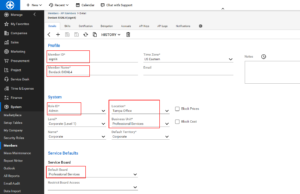
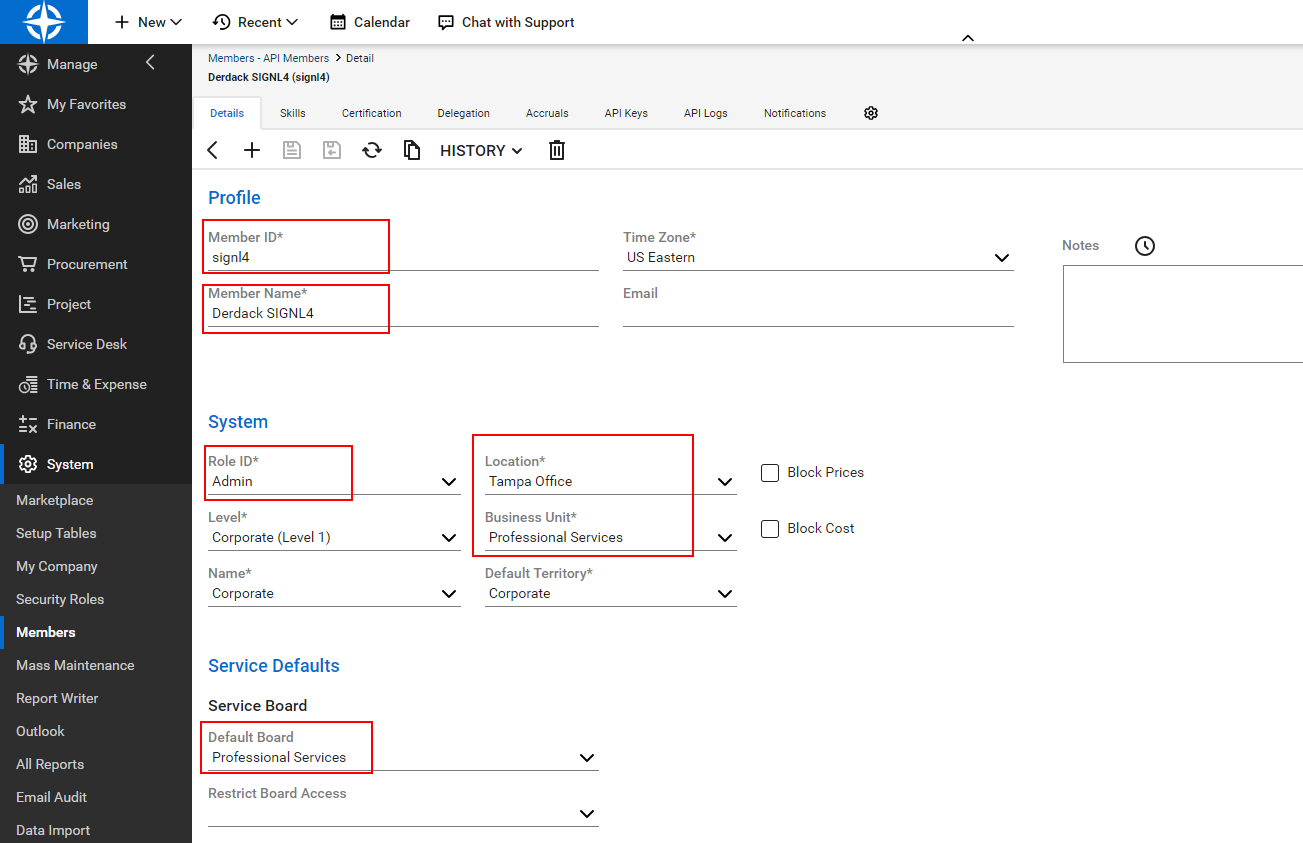
| API Member | signl4 | ConnectWise Administrator | Required for SIGNL4 to access the Manage REST API. Required properties/values: – Location – Business Unit – Default Board – Role: Admin – API Key Location, Business Unit and Default Board simultaneously define which service tickets can be retrieved by the connector app. |
| Custom Field | Signl4Retrieved_c | Connector App (automatically) | Tracking on the service ticket if it must be retrieved or has been retrieved – Not visible in the UI
|
| Custom Field | Signl4Status_c | Connector App (automatically) | Required for automatic closing of Signls when corresponding service tickets change their status – Not visible in the UI |
| Custom Field | Signl4User_c | Connector App (automatically) | Required for assigning ticket owners – Not visible in the UI |
| Workflow Rule | SIGNL4 – Trigger Signls | Connector App (automatically) | Defines which service tickets are retrieved. By default, all new tickets with the status “New (not responded)” are retrieved. – Must contain 3 event triggers (more information on request) – Can remain inactive (Invocation via Manage REST API) |
| Workflow Rule | SIGNL4 – Update Signls | Connector App (automatically) | Defines when Signls should be closed automatically (e.g. when the status of a ticket changes to “Closed (resolved)”) – Must contain 1 event trigger (more information on request) – Can remain inactive (Invocation via Manage REST API) |
| Workflow Rule | SIGNL4 – Update CW Tickets | Connector App (automatically) | Defines how service tickets should be updated when acknowledged or closed in SIGNL4. – Must contain 2 event triggers with corresponding actions (more information on request) – Can remain inactive (Invocation via Manage REST API) |
Setup Step 1 – Create API Member in Manage
Follow these steps to create the API member in Manage:
- Log in to ConnectWise Manage as an administrator
- Click on “Members” in the menu under “System”
- Now select the tab “API Members”
- Click on “New Item”

- Now set the following properties, among others:
- Member ID (example: “signl4”)
- Member Name (example: “Derdack SIGNL4”)
- Role ID: Admin
- Location
- Business Unit
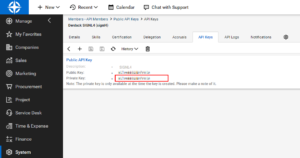
- Save the member and open the “API Keys” tab.
- Click on “New Item”
- Enter a name (example: “SIGNL4”) and save it.
- Now copy the private key (it is no longer visible) and save it together with the public key, both will be needed in the next section.


Setup Step 2 – Configure connector app in SIGNL4
The following steps will now create the connector app in SIGNL4:
- Log in to SIGNL4 as an administrator.
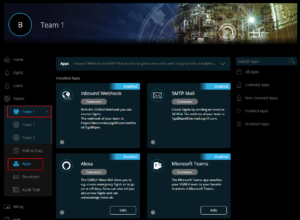
- Select the team in the menu for which you want to create the integration and then click on “Apps”.
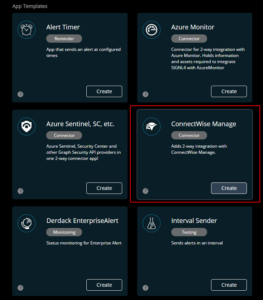
- At the bottom of the page, under App Templates, select ConnectWise Manage and click “Create”.
- Instance URI:
The root URL of your ConnectWise Manage instance without any additional path. An example is https://na.myconnectwise.net - Company ID:
Your ConnectWise Manage company id. - API Member ID:
The ID of the API member you created earlier in setup step 1 - Public API Key:
The public API key from the API key you created for the API member in Mange - Private API Key:
The private API key from the API key you created for the API member in Mange - Workflow Name – Triggering Signls:
Name of the workflow rule that will be used for the ticket transfer to SIGNL4 (see above). A workflow rule with this name will be created in Manage if it does not exist. - Workflow Name – Update Signls:
Name of the workflow rule used for automatic closing of Signls in SIGNL4 (see above). A workflow rule with this name will be created in Manage if it does not exist. - Workflow Name – Update CW Tickets:
Name of the workflow rule that defines how tickets are updated when Signls are acknowledged or closed in SIGNL4 (see above). A workflow rule with this name will be created in Manage if it does not exist. - Custom Field Retrieval:
Name of the custom field that controls the service ticket retrieval by SIGNL4 (see above). A custom field with this name will be created in Manage if it does not exist. - Custom Field Status:
Name of the custom field required for automatic closing of Signls in SIGNL4 (see above). A custom field with this name will be created in Manage if it does not exist. - Custom Field User:
Name of the custom field required for ticket owner mapping (see above). A custom field with this name will be created in Manage if it does not exist. - Owner assignment when:
Select here whether or when the user who acknowledges or closes in SIGNL4 is to be set as the ticket owner in Manage. The assignment is done via email address, i.e. the email of the user in SIGNL4 must be identical to the email address of the user in Manage (“Office email”). - Note options:
When a SIGNL4 user comments on a Signl, these comments are added as a note to the service ticket. Choose the flags you want these notes to be assigned (e.g. make sure it is added as an internal comment, not visible to the customer, etc.). - Additional details:
Select which details that may be linked to a service ticket should also be retrieved and added to the Signl.
- Instance URI:
- Once all fields are configured, click on “Create”.
- On the details page that appears for the created app, click “Enable”.
- After that, the connector app will connect to ConnectWise and then create workflow rules and custom fields.
Therefore, it may take some time until the app is activated.


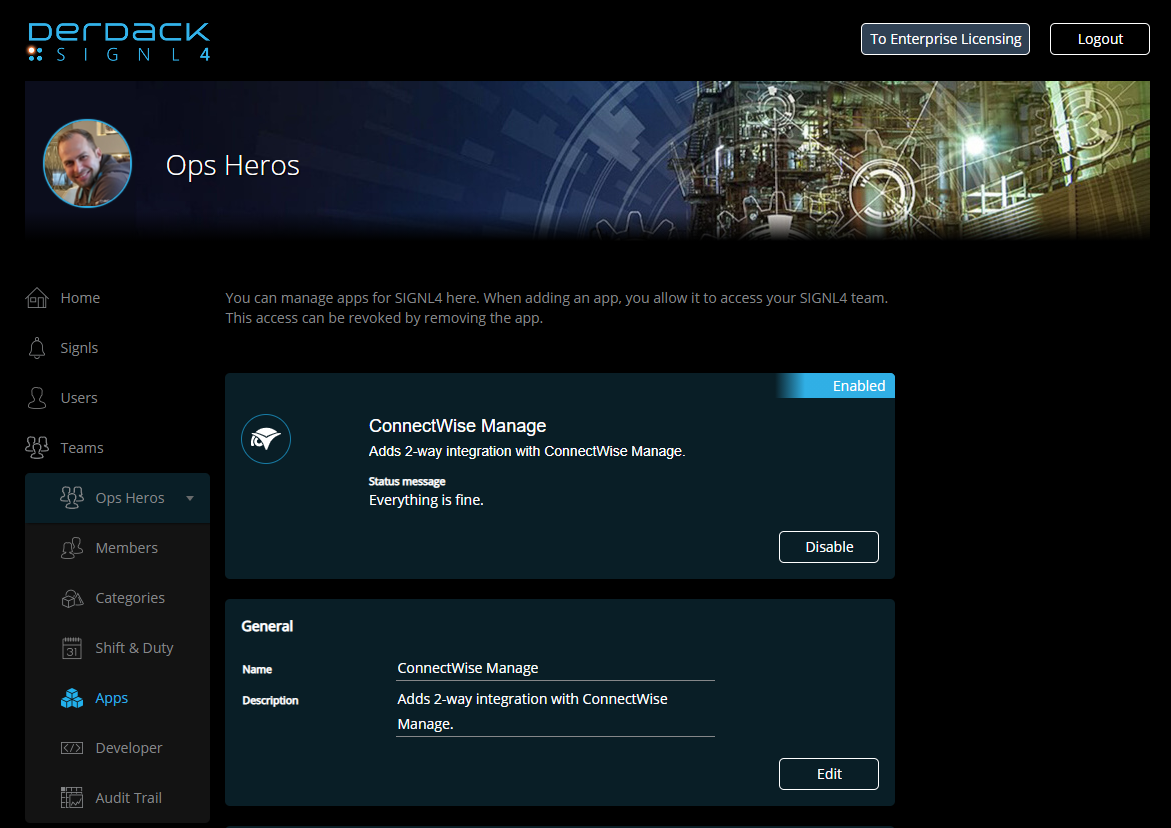
Done – ConnectWise Manage goes Mobile!
Once everything is set up and configured, you can now create a new service ticket in ConnectWise and then acknowledge, annotate and close it in the SIGNL4 mobile app. These actions are then synchronized back to Manage.